The Complete Step-by-Step Process of Professional Sod Installation: From Soil Testing to Final Roll
The SodFather specializes in premium sod installation and automated sprinkler systems for homes and businesses across Ontario. From soil preparation to final roll, we deliver lasting results, exceptional service, and stress-free lawn transformations.
The Complete Step-by-Step Process of Professional Sod Installation: From Soil Testing to Final Roll
We help homeowners and businesses build vibrant, healthy lawns that enhance curb appeal and value. Fast installation, premium soil, and expert care, your dream yard starts here.
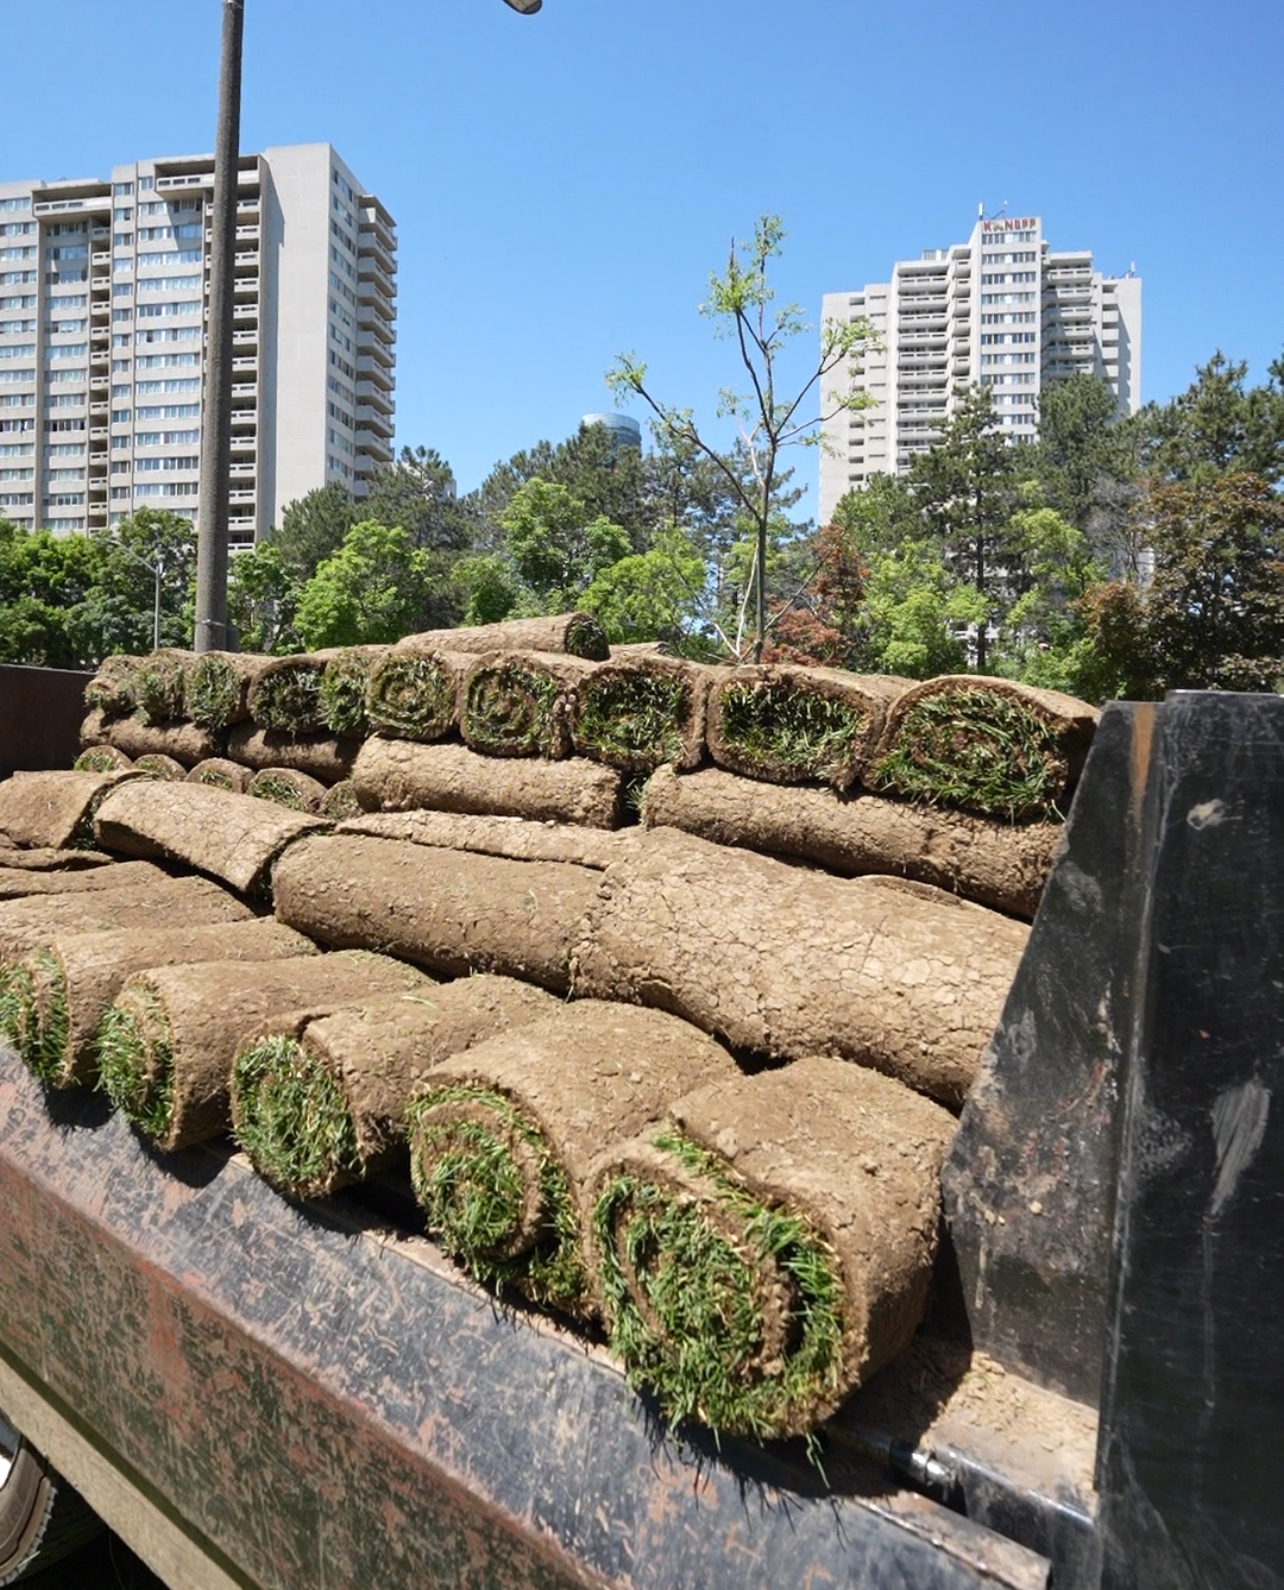
We exclusively install fresh-cut Kentucky Bluegrass from Greenhorizon Sod Farm, one of Southern Ontario’s most trusted growers.
● Sod is cut daily, delivered in skids, and installed the same day for maximum vitality.
● Known for its rich green color, durability, and thick coverage—ideal for family yards and high-traffic areas.
● Each pallet is inspected to ensure quality, density, and root health before installation.
“Professional sod installation isn’t just laying grass — it’s a science and art combined for a perfect lawn.”
If you’re thinking about upgrading your yard, fresh sod offers the fastest way to get a lush, green lawn that looks great immediately. But professional sod installation is more than just unrolling grass. It’s a carefully planned process designed to ensure your lawn thrives for years to come.
At Sodfather, serving Oakville, Burlington, Mississauga, Milton, and Hamilton, we follow a detailed, proven method to guarantee your sod roots deeply and grows healthy. Here’s a comprehensive look at every step involved — so you know exactly what goes into building your dream lawn.
Step 1: Soil Testing & Amendments
Before any sod touches the ground, we test your soil to check pH levels and nutrient content. Ontario soils can vary, so identifying deficiencies or imbalances is critical. Based on test results, we add lime, fertilizer, or organic amendments to optimize soil conditions. This preparation sets the foundation for strong root growth and long-term lawn health.
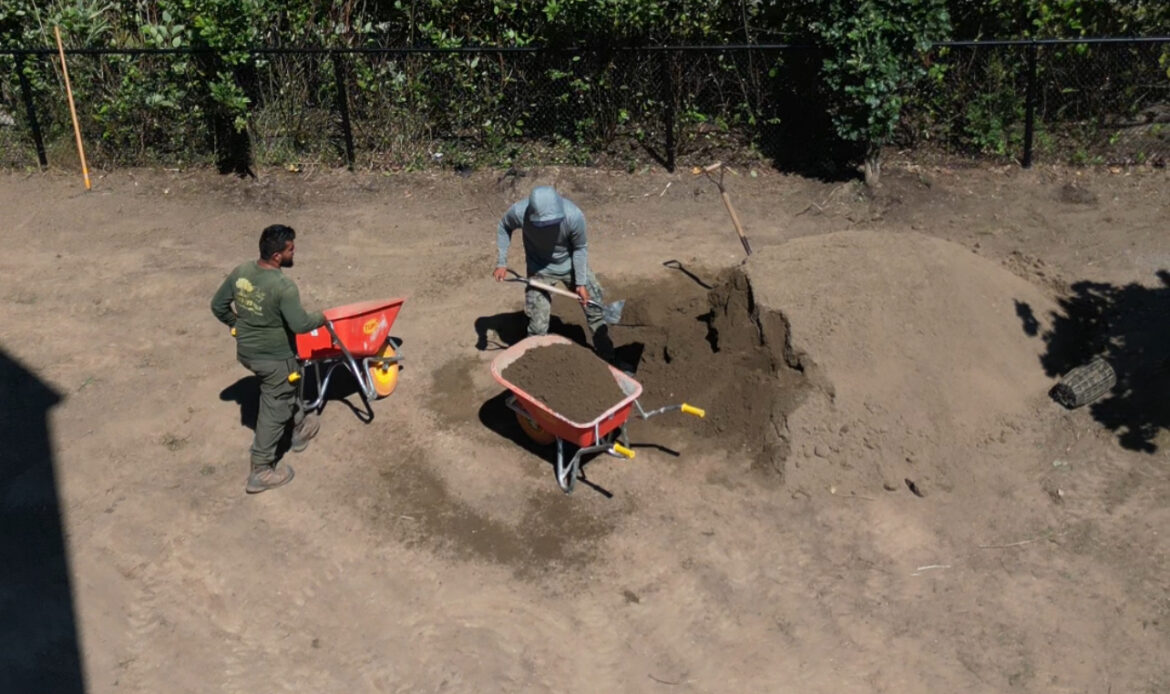
Step 2: Old Lawn Removal
Next, we clear the area of old grass, weeds, and debris. Using professional sod cutters or Bobcat machines, we remove up to 3 inches of old turf cleanly and efficiently. This prevents competition and diseases from affecting your new sod.
Step 3: Grading & Drainage
Proper grading is essential to prevent water pooling and soil erosion. We slope the ground gently away from your house and compact the soil to create a firm base. Without this, your new lawn could suffer from drainage issues or uneven growth.
Step 4: Topsoil Application
We apply a premium triple-mix topsoil blend that is rich in organic matter and nutrients. This layer enhances fertility, improves drainage, and provides the perfect medium for sod roots to establish quickly.
Step 5: Sod Selection
At Sodfather, we primarily install Kentucky Bluegrass sod, ideal for the climate in Oakville, Burlington, Mississauga, Milton, and Hamilton. This variety is known for its vibrant green color, durability, and disease resistance.
Step 6: Laying the Sod
Our team lays sod in a staggered brick pattern, which increases stability and reduces visible seams. We carefully cut and fit the sod around garden beds, walkways, and edges for a neat, professional finish.
Step 7: Watering & Rolling
Immediately after installation, we water the sod thoroughly to saturate both the grass and soil beneath. Then, we use lawn rollers to press the sod firmly into the soil, ensuring good root-to-soil contact — crucial for sod to “take” and thrive.
Step 8: Aftercare & Warranty
Proper maintenance in the first few weeks is vital. We provide detailed watering schedules, mowing tips, and care instructions to help your new lawn establish roots. Plus, Sodfather offers a warranty on installation, giving you peace of mind.
Serving Oakville, Burlington, Mississauga, Milton & Hamilton
With local knowledge and expert craftsmanship, Sodfather is your trusted partner for professional sod installation in the Greater Toronto Area. We combine quality materials, skilled labor, and attention to detail to deliver lawns that stand the test of time. Ready to Transform Your Lawn? Contact Sodfather today for a free consultation and quote. Let us help you create the lush, green lawn you deserve!